
Pixie braids are super cute and look extremely stylish on just about anyone. Although they might look awfully complicated to do, they’re actually fairly simple to do. This particular type of braid is ideal for those who have shorter hair and want to create a defined look.
How are pixie braids different to other braids?
In case you’re wondering, there are a number of different braiding techniques. Each technique gives of a different result and a different look. With pixie braids the braiding goes right until the tip of the hair, which results in a more finished look.
Should you get pixie braids?
Yes! If you’re tired of your look and want to experiment with something different, then we’d strongly suggest these braids. However, it should be noted that these braids look best on those who have short/ medium length hair. It can be done on longer hair, but might require more time and effort.
Pixie braid on natural hair vs. extensions
If you have very short hair then you might need to use hair extensions for this look. The hair extensions can easily be added to natural hair and actually work a lot better than natural hair.
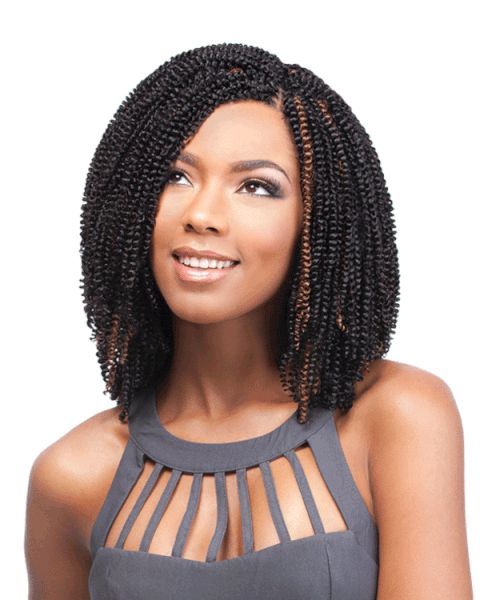
Pixie braids also look a lot better on ethnic hair and it’s a lot easier to do.

How to get the look
Now that you know more about this sort of braid, here are some steps that you can follow to achieve beautiful tresses.
Part the hair
The first step to this guide is crucial; therefore make certain to part the hair correctly. The way the hair is parted will determine how the hairstyle will come out.
You can choose a specific parting style that you want, depending on what you prefer. This can be in any direction that you like.
Section the hair
Once you’ve established the parting style of your hair, you can start sectioning it into smaller pieces. Working with smaller pieces will allow you to get the perfect pixie braid.
Separating the hair and sectioning each part can be very time consuming, but it will give you an excellent end result.
Grab a small piece of hair
Now that the sectioning and parting have been completed, the braiding process can begin.
Grab a small piece of hair and further separate it into three equal pieces. Next, braid the hair from the roots and ensure that the braids aren’t loose. The reason that these braids need to be tight is because they will allow you to achieve the perfect pixie braid.
Braid right till the end
Unlike most braids, pixie braids require you to braid the hair to the very end. The reason for this is so that the hair sits perfectly intact towards the ends.
Optional step (for ethnic hair)
This step is an optional one for those who have ethnic hair. It will allow the hair to last for a longer time and will hold a lot better into position.
After the hair is braided right until the end, grab a lighter or candle holder and allow some heat to penetrate the tips. This will allow the tip of the hair to release and then swirl the hair into a pin curly.
*This step should be done with extreme caution
Pin curl the hair
For those who don’t know what a pin curl is, it simply gives the tips of the hair a nice and natural curl towards the end.
Once you have burnt the tips of the hair start pin curling it right to the root. If you’re strapped for time you can take 3 braids at a time and twirl them together into a pin curl and release after a few seconds.
Tip: Use a bobby pin to get the curl to hold better when pin curling the braid. You can even sleep with it overnight to allow a more dramatic curl.

The end result
After the pixie braids are done you will be left with small braids throughout your hair. It naturally makes the hair look fuller and more voluminous.
A great advantage to getting pixie braids done is that they require very little maintenance. They are super easy to take care of and can even get wet without breaking or getting damaged. Ideally, these braids work best on African hair.